Showing posts with label paper. Show all posts

Tuesday, March 29, 2022

First Grade Dragons


First Graders learned about Lunar New Year and read the book "My First Chinese New Year" by Karen Katz. We discussed Lunar New Year traditions and connected this learning to the traditions we observe at Rosh Hashanah, the Jewish new year. We also discussed how dragons in European and American stories are often depicted as bad guys, whereas in Chinese culture, they are a symbol of strength and good luck. 

To create their dragons, first graders observed several dragon paintings and weavings. They observed the different kinds of shapes and lines, and watched step by step demonstrations about how to put these together to create the form of the dragon. 


Tuesday, May 19, 2020

Windows in Art (Rashi School Online Lesson)


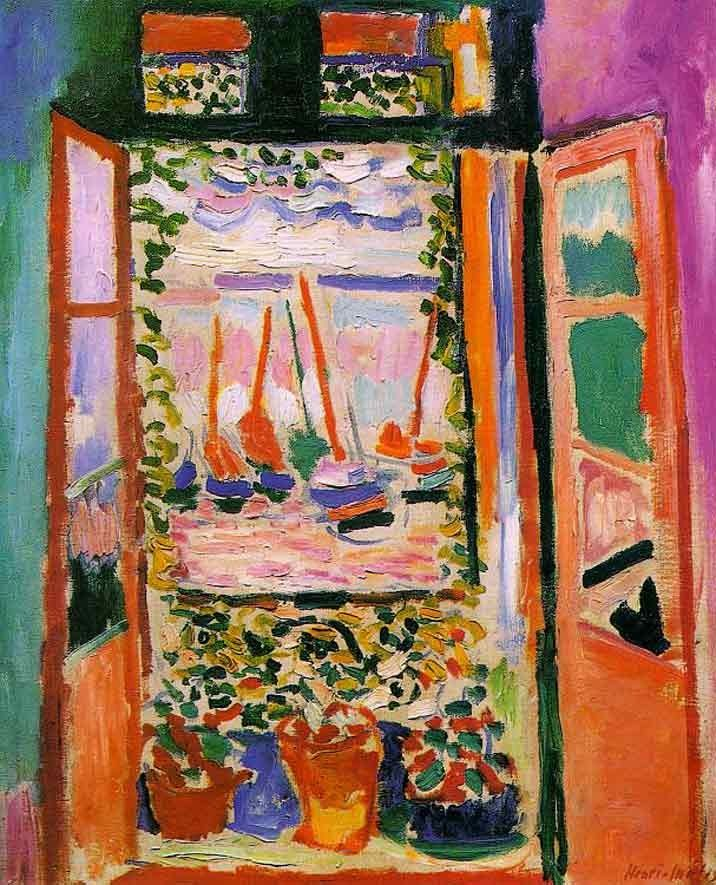
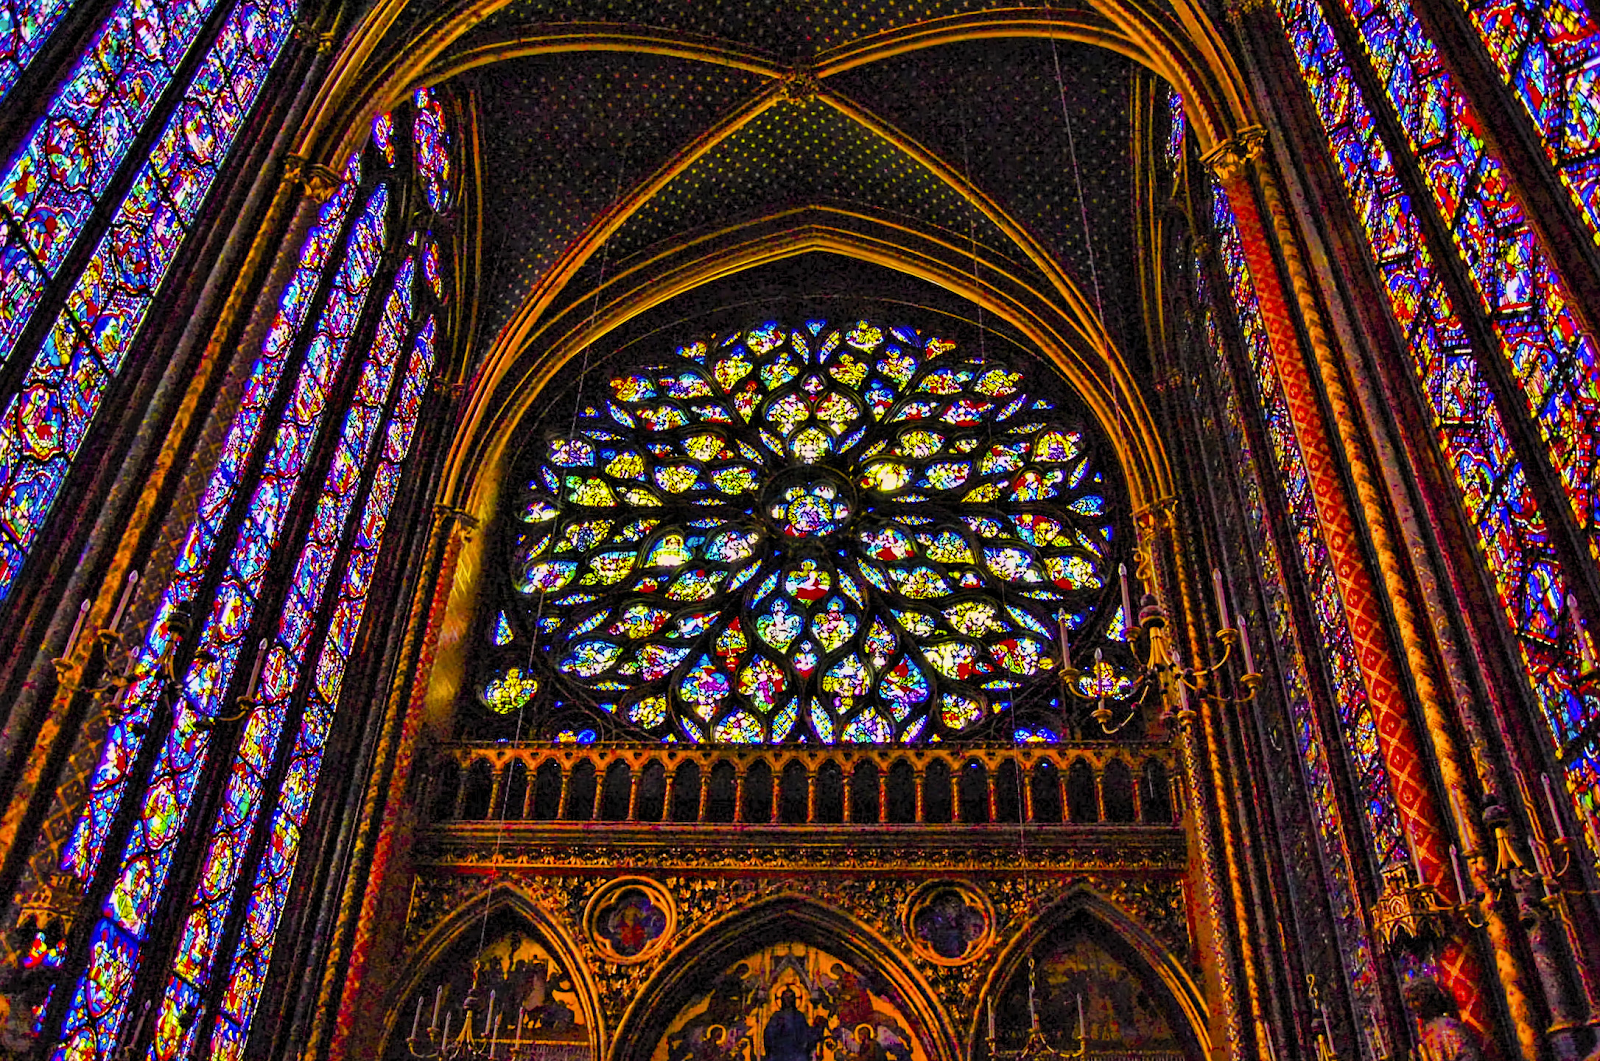
Windows have inspired many artists. Here are some amazing ways that artists have represented windows:

Salvador Dali, Figure at the Window, 1925

Henri Matisse, Open Window at Collioure, 1905

Rene Magritte, The Telescope, 1963

Marc Chagall, Hadassah Hospital Windows

Notre Dame Cathedral, France

Windows have been an inspiration for authors and illustrators, too! This great book, Outside my Window, by Linda Ashman, is a perfect companion to our lesson about windows. 

What do you see out your window? Try drawing the window, then observe the details of the things you see outside and draw them, too. 

Sunday, April 26, 2020

Texture Comics: Part 2: Creating a Comic Strip (Rashi School Online Lesson)

Hello everyone! This is a lesson for my students at The Rashi School. By now, you've probably seen my lesson Texture Comics, Part 1 and created four texture comic characters, using texture lines and shapes.

Here are mine, remember?

Materials:
-Paper
-Ruler or straight edge
-Pencil
-Black pen or sharpie for outlining
-Markers or colored pencils for coloring

Now, it's time for those characters to have an adventure or two!  First, write down the answers to these questions, to plan your stories:
  • What is the title of your texture comic strip?
  • What are the names of your characters?
  • Are there good guys and bad guys? If so, who is who?
  • What is going to happen?
  • First...
  • Then...
  • Then...
  • Then...
  • Finally...
Got some good ideas? Now, take a piece of paper and use your ruler and pencil to divide it into either 6 or 8 boxes. You can do more, too- depending on how long your story is. 

Your first box should include your name and the title of your comic. The rest are up to you, but you must fill them all! My comic ends on a cliffhanger...


Spoiler alert: Don't worry! Coco the Fuzzy Chick doesn't get eaten by Sam the Scaly Snake- she was just stuck in Fifi the Fluffy Sheep's wool! 

Saturday, April 18, 2020

Stained Glass Drawings (Rashi School Online Lesson)

Today we are going to create drawings that will look like a kind of art called stained glass. Stained glass is made with colored glass and metal. It is not easy to do, I have tried it!

Here are some famous artists who have made stained glass.

Marc Chagall, Tribe of Benjamin, 1962


Kehinde Wiley, Saint Remi, 2014


Nasir al-Mulk Mosque, Iran, 1800's

Materials:
-A small object, about the size of your fist
-A pencil
-A piece of white paper
-A black marker or pen
-Something to color with (colored pencil, marker, crayon)

Here's what we're making. I created it by tracing something I found in my house. Can you guess what it is?


If you guessed a roll of tape, you're right!


1. First, choose an object. It can be anything you want, as long as it's about the size of your fist.


2. Ready? Now, use your pencil to trace it onto the white paper. You can start anywhere you want.


3. Now, trace it again. BUT make sure that you put the object down so that it is on part of your first tracing.


4. See how some new shapes were created with the two tracings? Here, I will show you by highlighting it:


5. Now, continue to trace and overlap until you've filled the page. You should trace the object at least 8 times.


6. When you have it traced at least 8 times, go over all of your lines with a black marker or pen. this is what will look like the black lines in stained glass.


7. Then, notice all the new little shapes and start coloring them in.


Wednesday, March 18, 2020

Surrealist Apple Drawing (Rashi School Online Lesson)

Hello everyone! This is a project for my seventh graders at The Rashi School. I hope you'll join along!

This project is designed to help you practice and demonstrate your shading skills, and to give you a great outlet for your creativity and imagination. It is called the Surrealist Apple project.

Materials: Paper or sketchbook, pencil (4H and 2B are ideal, but any kind will do- mechanical is not best though),
Time Needed: Four to six 30-minute sessions
Procedure:
Session 1 & 2 (60 minutes total):
-Watch the intro video below.
-Review shading techniques (video links provided).
-Draw an apple in your sketchbook or on a practice page, and then shade it.
-Create a final draft of an apple on a separate piece of white paper.
-Next, in your sketchbook or practice paper with the drawing of the apple, create a draft of your surreal setting. It can be anything and anywhere you want, but it should be strange and unexpected, and it must be in a realistic style. It can be a pun or a joke. You may use reference images, but no tracing.
Session 3 & 4 (60 minutes total):  On your final draft paper, in the background of the apple, create a surreal setting. Use color- any color media you'd like.

Click below to see the video introduction to the lesson:
Seventh Grade Surrealist Apples- Intro to lesson

Surrealism is an art movement that was started in the 1920's. The style is dreamlike, strange, and sometimes even creepy. Art historians have written that the reason for this style could be because this was a time right after World War One. People were trying to recover from all of the horrible things they had seen during war time, and perhaps being strange or dreamlike was a way of getting some distance from real life, and the nightmare they'd been through.

One of the most famous Surrealist artists was Salvador Dali. He painted The Persistence of Memory.
 

Another famous Surrealist was Rene Magritte, who painted this famous painting, The Son of Man.


Here are some important reminders about shading a round object:
  • Start with the darkest values
  • Keep your shading lines curved
  • The darkest value is under the circle
  • Remember to leave a highlight in white

Here is a video to remind you of some shading techniques:

And here is a diagram that will be helpful to you:


Here are my sample projects. I had a lot of fun making these. I hope the eye one doesn't creep you out to much... There are also some awesome samples of student work in the links below these pictures.


Surrealist Apple Project Samples
Even More Surrealist Apple Project Samples

Good luck everyone! Enjoy.