Friday, March 20, 2020

Digital Art Radial Designs (Rashi School Online Lesson)

Hello everyone! This is a lesson for my students at The Rashi School. I hope you'll join along.

Today you'll be exploring the online drawing app Myoats. First, watch the tutorial below. Then, go the webpage and experiment with the techniques I've demonstrated in the tutorial to create a design with radial symmetry. Finally, try out some of the techniques by completing several design challenges.


MyOats Tutorial Video

Skills reviewed in the tutorial:

  • Mirror 
  • Changing brush colors
  • Choosing number of axes
  • Darkening/lightening colors
  • Changing brushes
  • Varying brush size
  • Varying opacity
  • Creating dots
  • Undoing work
  • Downloading finished work
  • There is a guide to all of the functions on Myoats here
Vocabulary:
  • Opacity
  • Radial Symmetry

Projects:
Plan to spend approximately 10 minutes on each project.

  1. Create a radial design using just black and white.
  2. Create a radial design that expresses how you're feeling about what's going on in the world right now
  3. Create a radial design that makes you feel calm. 
  4. Create a radial design by writing your name in cursive with your finger or mouse, at least four times.
  5. Create a radial design that makes you feel dizzy.

Thursday, March 19, 2020

3-D Hands! (Rashi School Online Lesson)

Hello everyone! This is a drawing lesson for my students at The Rashi School. I hope you'll join along!

This is a popular drawing project on Pinterest. It's simple, and very cool. In this project, you will learn how the shape and directionality of your lines can lead to the illusion of 3-dimensionality on a 2-dimensional (flat) surface, in this case a piece of paper.

Materials: pencil, paper, black marker or pen, colored markers or colored pencils
Time Needed: Two 30-minute sessions

Here are the steps:

  1. Trace your hand and wrist on paper with pencil
  2. Using a pencil (in the photo, it's a marker, but I suggest pencil), draw a straight line until you reach your hand tracing, then create a curved line where your hand/wrist shape is. Then, continue the line to the other side in a straight line. It is as if there's a "bump out" where your hand/wrist is, and this is what gives it the 3-D effect.
  3. When you're going over your fingers, the lines are curved on the fingers, and straight in between the fingers
  4. Go over all of your lines with black marker. Do NOT outline your hand!
  5. Use two or more colors between the black lines. 
  6. Finish, stand back, look and say "WHHHHHOOOOOAAAAAA!!!"


Third Grade Texture Scavenger Hunt (Rashi School Online Lesson)

Hello third graders! This is a lesson for my students at The Rashi School. I hope you'll join in!

It's time for a texture scavenger hunt. This activity will have you moving, collecting, sketching, and writing.

There are three activities in this unit.
1. A scavenger hunt and list
2. A poem
3. Sketching from observation

Materials: pencil, papers, clipboard or book to lean on, colored pencils or markers (if you have them)
Time needed: Two or three sessions, about 30 minutes each

Visual Texture

Visual texture is texture that you can see, but cannot feel. It's created on a flat surface, with drawing materials. It's sort of like an illusion. Artists use visual texture to add realistic detail to their work. German artist Albrecht Durer was very, very good at it!

Rhinocerus, 1515

Rabbit, 1503

Surface Texture
Surface texture is a texture you can feel as well as see. It is three-dimensional, which means it is not flat. Thornton Dial was an artist who used found objects such as metal, wire, and wood to create surface texture in his paintings.
Out of Darkness, the Lord Gave us Light, 2003

Louise Nevelson created sculptures with wood and cardboard to create surface texture.
Untitled

So, here's what you need to do:

Part 1:
  1. Go around your house (you can go outdoors too!) and find at least ten things that have surface texture. 
  2. Make a list of the things, using one texture adjective and one texture noun. If you can't think of the texture words on your own, you can use the texture word list below.
  3. You can't use the same object twice, and you can't use the same texture adjective more than twice.
  4. Write a texture poem with all of your texture words and nouns: For each pairing, add some words that tell us more about the thing and how you feel about it. 
  5. The last line of your poem is up to you and your imagination, but it should sum up some of your thoughts and feelings about the things you found in your house, or how you feel about your house.
Here is my example of a texture poem:

My Comfy Home
Fuzzy yarn I love to knit with
Furry dog who likes being scritched behind the ears
Soft slippers that feel great on my feet
Woven basket of tasty fruit to snack on
Bumpy lamp that spreads light around the room
Shaggy carpet that I'll vacuum... later
Curly flower petals in a vase
Smooth kitchen table that is my favorite shade of green
Wet stairs on this rainy day
Lacy curtains that look pretty in the window
Bumpy Duplos that I keep stepping on
I love being in my comfy home with my family.

Here's the list of texture adjectives. 
(You can use others that you think of too)
  • Woven 
  • Scratchy 
  • Tangled 
  • Hairy
  • Blistered
  • Scaly
  • Ribbed
  • Curly
  • Frizzy
  • Lumpy
  • Grainy
  • Sharp
  • Fluffy
  • Bubbly
  • Prickly
  • Fuzzy
  • Slimy
  • Pocked
  • Gritty
  • Bristly
  • Doughy
  • Knotty
  • Jagged
  • Scratchy
  • Rocky
  • Stubbly
  • Lacy
  • Feathery
  • Whiskered
  • Bumpy
  • Spiky
  • Smooth
  • Rough

Part 2: Texture Drawings
  1. Pick at least four of the things you found in your house and create four drawings of them with pencil. Make sure to use lines and/or shapes to show the texture of the object! If you're confused, please see some examples from the chart below. You can use a realistic or a cartoon style. Make sure you're observing them while you draw them, so you can see lots of detail.
Here are some ideas about how to include texture in your sketches, using lines and shapes:


Wednesday, March 18, 2020

Surrealist Apple Drawing (Rashi School Online Lesson)

Hello everyone! This is a project for my seventh graders at The Rashi School. I hope you'll join along!

This project is designed to help you practice and demonstrate your shading skills, and to give you a great outlet for your creativity and imagination. It is called the Surrealist Apple project.

Materials: Paper or sketchbook, pencil (4H and 2B are ideal, but any kind will do- mechanical is not best though),
Time Needed: Four to six 30-minute sessions
Procedure:
Session 1 & 2 (60 minutes total):
-Watch the intro video below.
-Review shading techniques (video links provided).
-Draw an apple in your sketchbook or on a practice page, and then shade it.
-Create a final draft of an apple on a separate piece of white paper.
-Next, in your sketchbook or practice paper with the drawing of the apple, create a draft of your surreal setting. It can be anything and anywhere you want, but it should be strange and unexpected, and it must be in a realistic style. It can be a pun or a joke. You may use reference images, but no tracing.
Session 3 & 4 (60 minutes total):  On your final draft paper, in the background of the apple, create a surreal setting. Use color- any color media you'd like.

Click below to see the video introduction to the lesson:
Seventh Grade Surrealist Apples- Intro to lesson

Surrealism is an art movement that was started in the 1920's. The style is dreamlike, strange, and sometimes even creepy. Art historians have written that the reason for this style could be because this was a time right after World War One. People were trying to recover from all of the horrible things they had seen during war time, and perhaps being strange or dreamlike was a way of getting some distance from real life, and the nightmare they'd been through.

One of the most famous Surrealist artists was Salvador Dali. He painted The Persistence of Memory.
 

Another famous Surrealist was Rene Magritte, who painted this famous painting, The Son of Man.


Here are some important reminders about shading a round object:
  • Start with the darkest values
  • Keep your shading lines curved
  • The darkest value is under the circle
  • Remember to leave a highlight in white

Here is a video to remind you of some shading techniques:

And here is a diagram that will be helpful to you:


Here are my sample projects. I had a lot of fun making these. I hope the eye one doesn't creep you out to much... There are also some awesome samples of student work in the links below these pictures.


Surrealist Apple Project Samples
Even More Surrealist Apple Project Samples

Good luck everyone! Enjoy. 

Creating Cities with Perspective (Rashi School Online Lesson)

Project: Cities with Perspective
Materials: Pencil, ruler, paper, colored pencils or markers, pencil preferred
Time to complete: Approximately four or five 30-45 minute sessions.
Procedure: Watch intro video, read directions, draw and color!

Hi fourth graders! In this lesson, you'll learn how to draw a city using the technique of perspective. Perspective is when artists make something two-dimensional (flat) look like it's not flat. Perspective techniques make it look like a flat surface has depth- in other words, it looks like you could walk right into this painting here: 


This painting is by an artist named Allan Rohan Crite. He was born in 1910 and he painted this in 1935. There is a LOT of depth in this painting! He really knew how to use perspective drawing tools. Soon, you will too. 

For this project, you can design any kind of city you want. It can be an outer-space city, a candy city, a sports city, a cat city... the sky is the limit. Actually, the horizon is the limit- but we'll talk about that soon...

Are you excited yet? I hope so.

First, watch this five-minute video in the blue link below. I created it to show you how this artist created perspective. You don't need to write any of what I say down, because I will type it in here for you before the end of this post. 

Here we go!
How did Allan Rohan Crite create perspective in his painting?

2. Now, follow along as I show you how to begin creating your city. 
You will need:
-a piece of paper
-a pencil
-a ruler or something with a straight edge

That's it!

For this demonstration I'm using images I created with a digital drawing app, because it's easier for me to get them onto this blog that way. So, if they look different, that's why. 

3. Get your paper ready. With your ruler, draw a line across the long way. This is what's called the horizon line. (Sound familiar? It's part of the word horizontal, which means an line that goes across)
The horizon is where you can't see the land anymore, and where it looks like the sky begins. Now, this can be confusing because we know the sky is above us- but trust me. 
*Your horizon line does not need to be perfectly in the middle. It can be lower or higher- that's up to you!
4. Now, start putting in buildings. Buildings can be below the horizon line, across the horizon line, or on the horizon line. Why can't they be above it? Because then they'd be in the sky. I made a couple of each. Notice I erased the horizon line when it went through the buildings. Why? Because you can't see the horizon line any more. That's an example of overlapping!
5. Now, let's talk about roads. Then, I'll let you know the expectations for the project, and I'll review my information from the video about how to create perspective. When you create a road, it is getting further away. If you remember what I talked about in the video, things that get further away get smaller. So, your road should get skinnier as it goes toward the horizon line.
Uh oh- did someone notice a problem? My road ran into my building! Ow. I'm going to erase part of the road because I know that the building is closer- it's overlapping!  

That's better. I added some lines on the road, too. Now, my city is NOT complete, but those are the main things I wanted to show you. Now, you can use these techniques, and your own creativity, to make your own city!

So. Here's what you need to do. 

Using techniques of perspective and depth, create your own city with any theme. 
You must include at least four buildings and two roads.
You must use each of the four techniques of creating perspective, at least once.
(You can review these below or in the video above.)
Include plenty of detail and use color on the whole page.
You can use colored pencil or markers, whatever you've got!
How to Create Perspective


Objects that are further away:
-Further up on the page
-Get overlapped by closer objects
-Smaller
-Less detailed
Objects that are closer:
-Further down on the page
-Overlap other objects
-Larger
-More detail

Color Wheels With Found Objects! (Rashi School Online Lesson)

Hello everyone! This is a lesson for my students at The Rashi School. I hope you'll join along!

Click on this link for a video with the directions!

Color Wheel Video Directions

Project: Found object color wheels
Materials: Stuff around the house!
Time to complete: 30-40 minutes

Hi, first graders! Here's how to create your own color wheel at home- no paint needed! You can follow along with the video (you'll need to make sure to pause it between steps when you need to do different things), or you can read along with the directions and photos.

This lesson is fun, it will get you moving and exploring, and it will show you just what a colorful home and what colorful stuff you have! Remember: ask before you borrow anything!

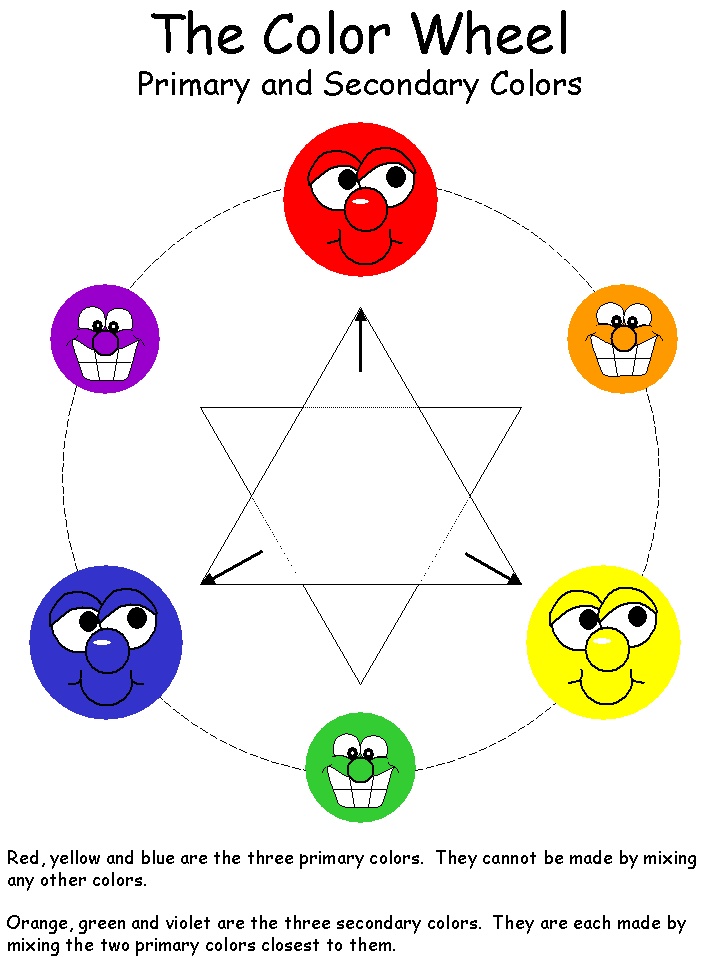
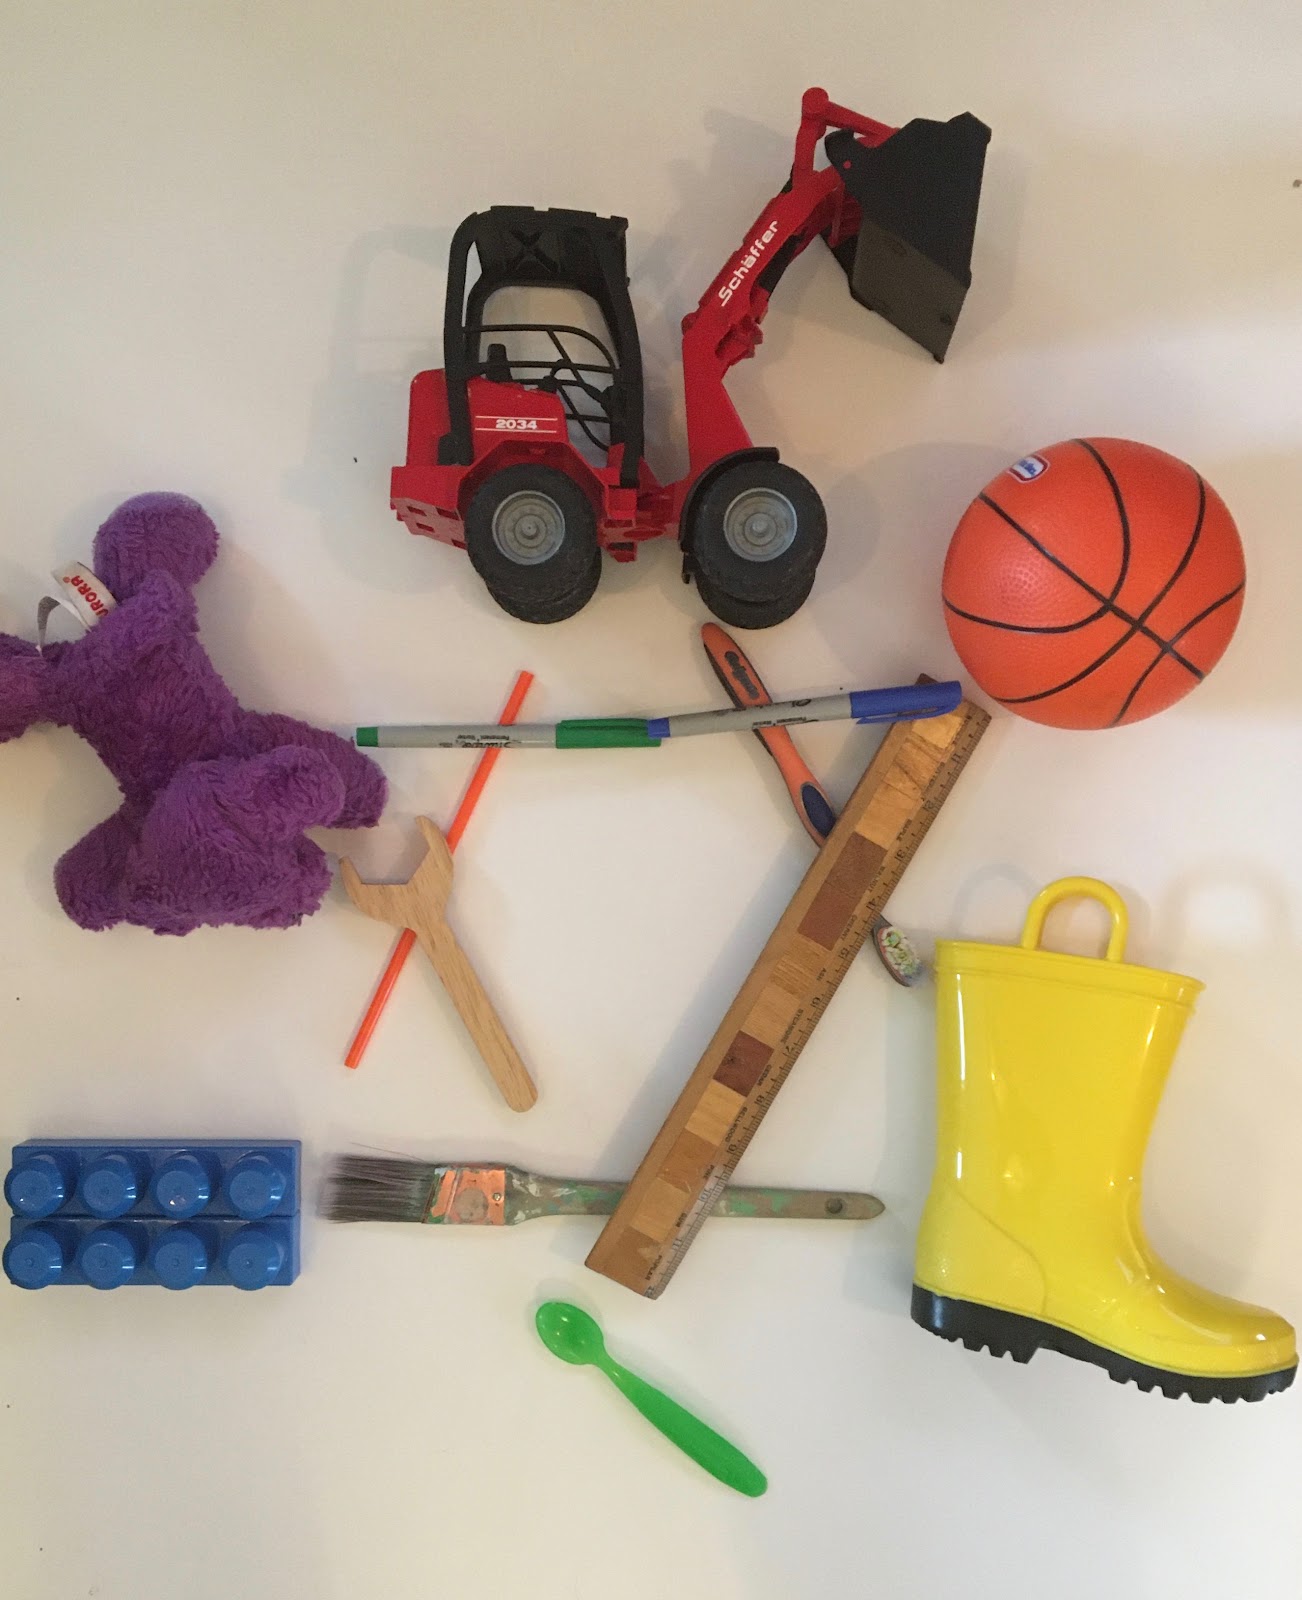
Here's a color wheel image I found online...               And here's my homemade color wheel!
.      
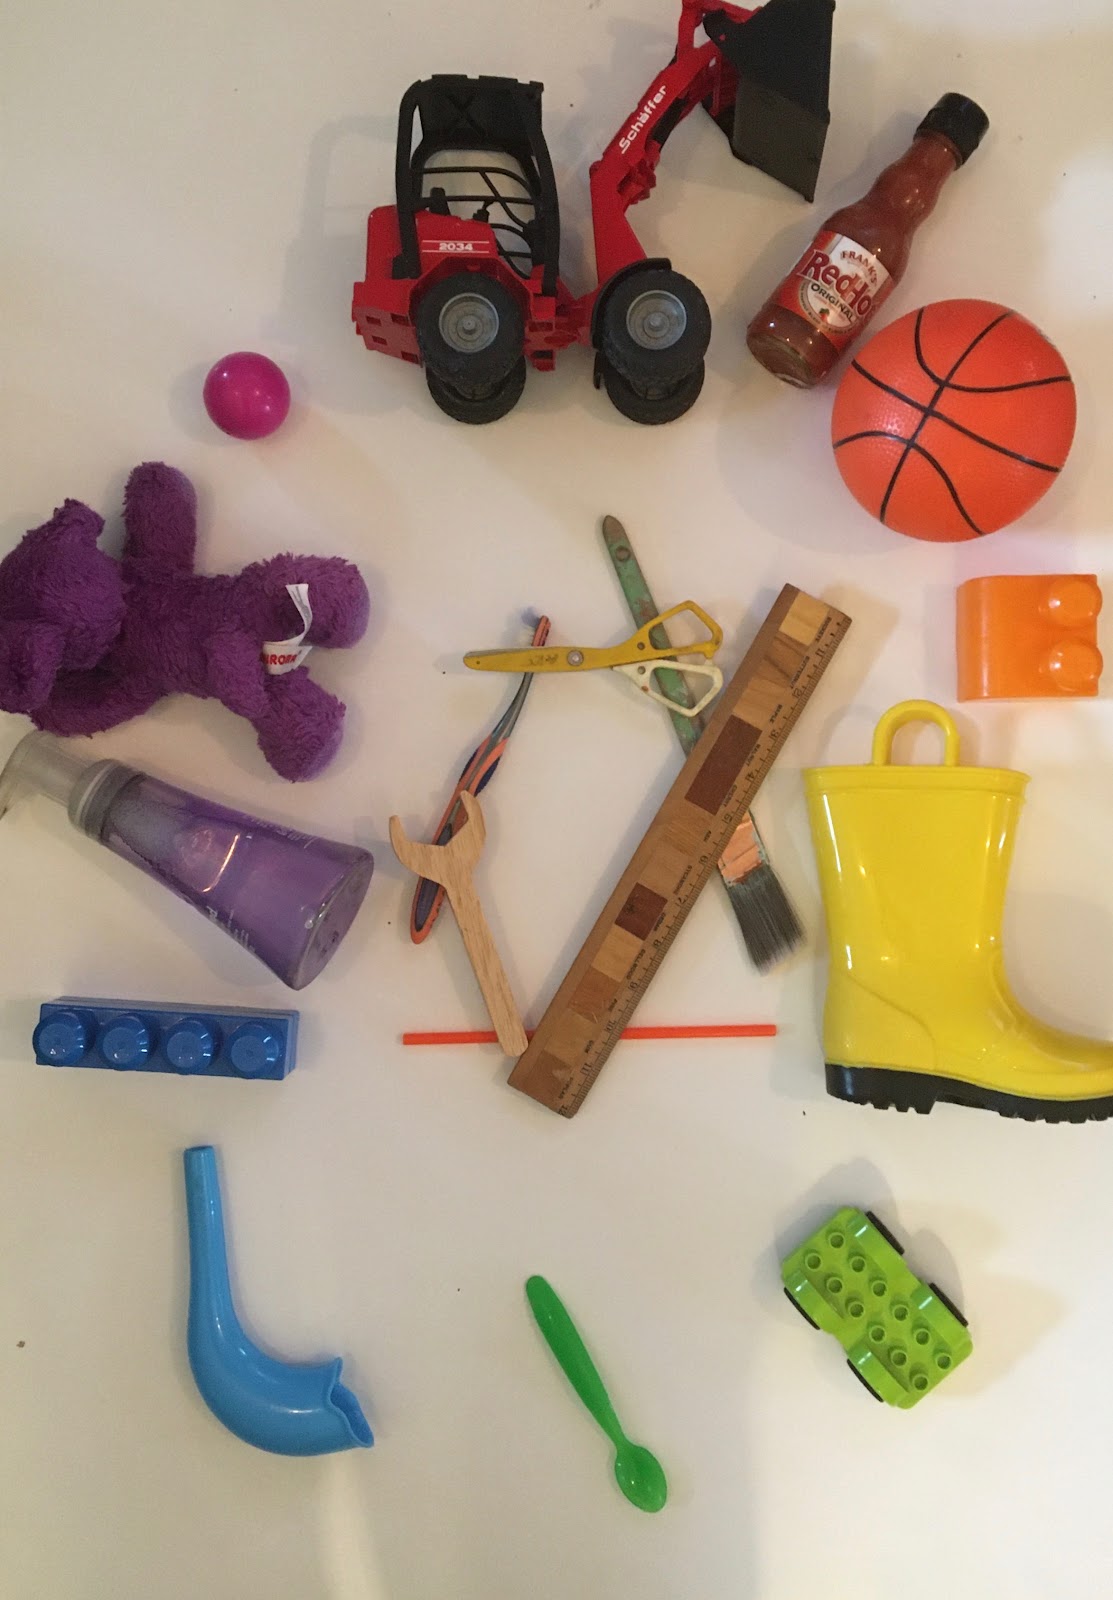
-First, find three primary color objects: one red, one blue, and one yellow.
They don’t have to be all that color, but they should be mostly that color.
-If the things don’t belong to you, ask before taking them, and of course,
put them away when you’re done. Make sure that the colors look like the
ones on the color wheel- for example, be sure that the blue is really blue
and not turquoise, which is a mix of blue and green!
-Put them on a paper or a rug or a table. Make sure they’re in the right spots-
check the picture of the color wheel! 
-Then, find three secondary color objects: one purple, one yellow, and one green.

-Make sure they’re in the right spots- check the picture of the color wheel!
-Remember, the color wheel is like a map that shows you which primary colors
make the secondary colors. So, orange should be between red and yellow,
because orange is made of red and yellow!

Now, find three long objects- look at the silly stuff I used! Oh boy, I’m going to have a lot of stuff to put away… First, show that the primary colors are connected in a group. Red connects to yellow, yellow connects to blue, blue connects to red- just like in the photo.

Now, get three more long objects and connect the secondary colors, like this!
Remember when you guys noticed that the color wheel looks like a Jewish star
because of the two triangles? Well, there it is! 


****** Now, take a picture of your color wheel and send it to me so I can see it!
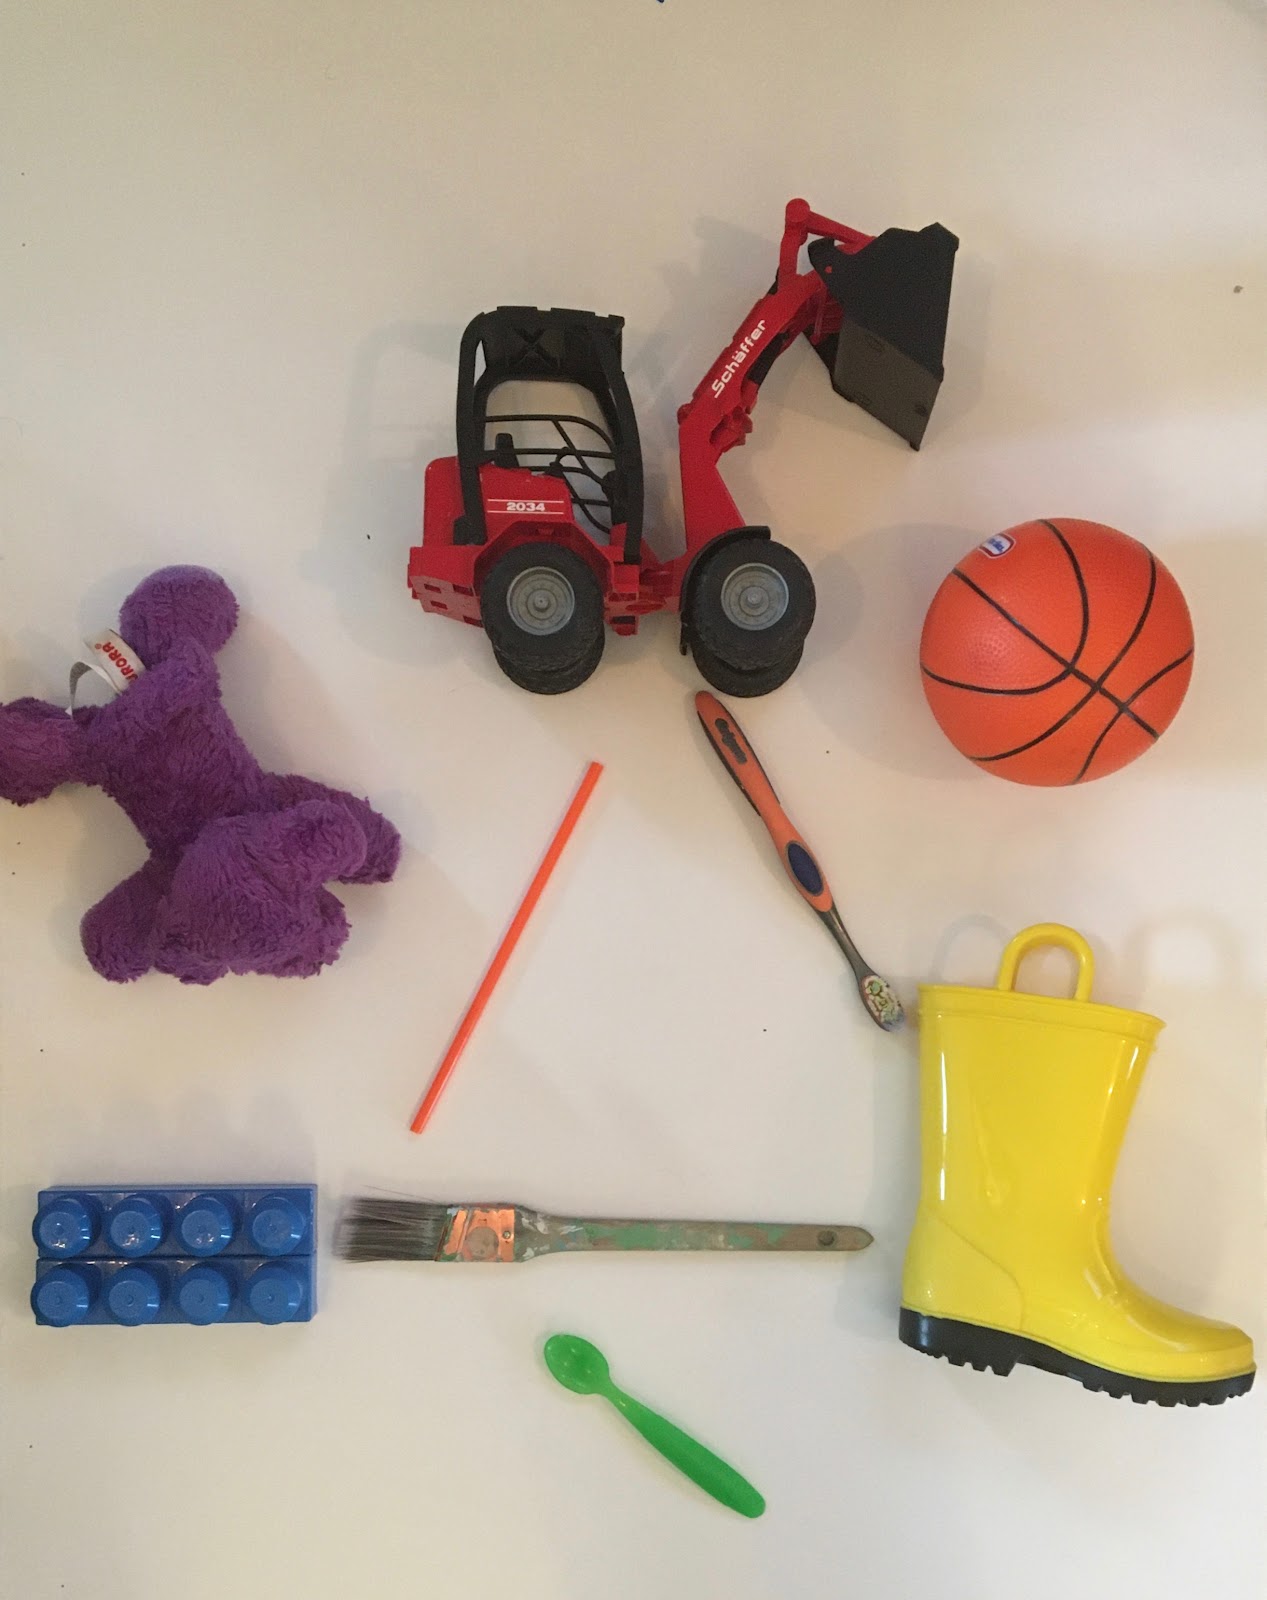
Here’s my finished color wheel. 
My email address is esmiley@classroom.rashi.org

Hey, wait! Don’t go yet! do you want an extra challenge?
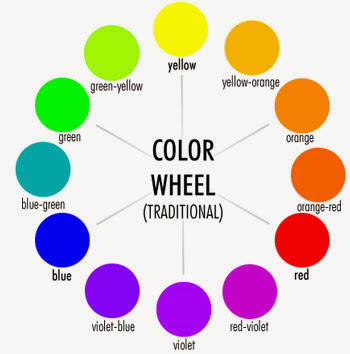
Before you put your things away, look at THIS color wheel.
It has even more colors: green-yellow, yellow-orange, orange-red, red-violet,
violet-blue, and blue-green. Continue the activity by finding even more objects in these colors.
You can see a picture of mine:


Wednesday, March 4, 2020

Third Grade Texture Collages

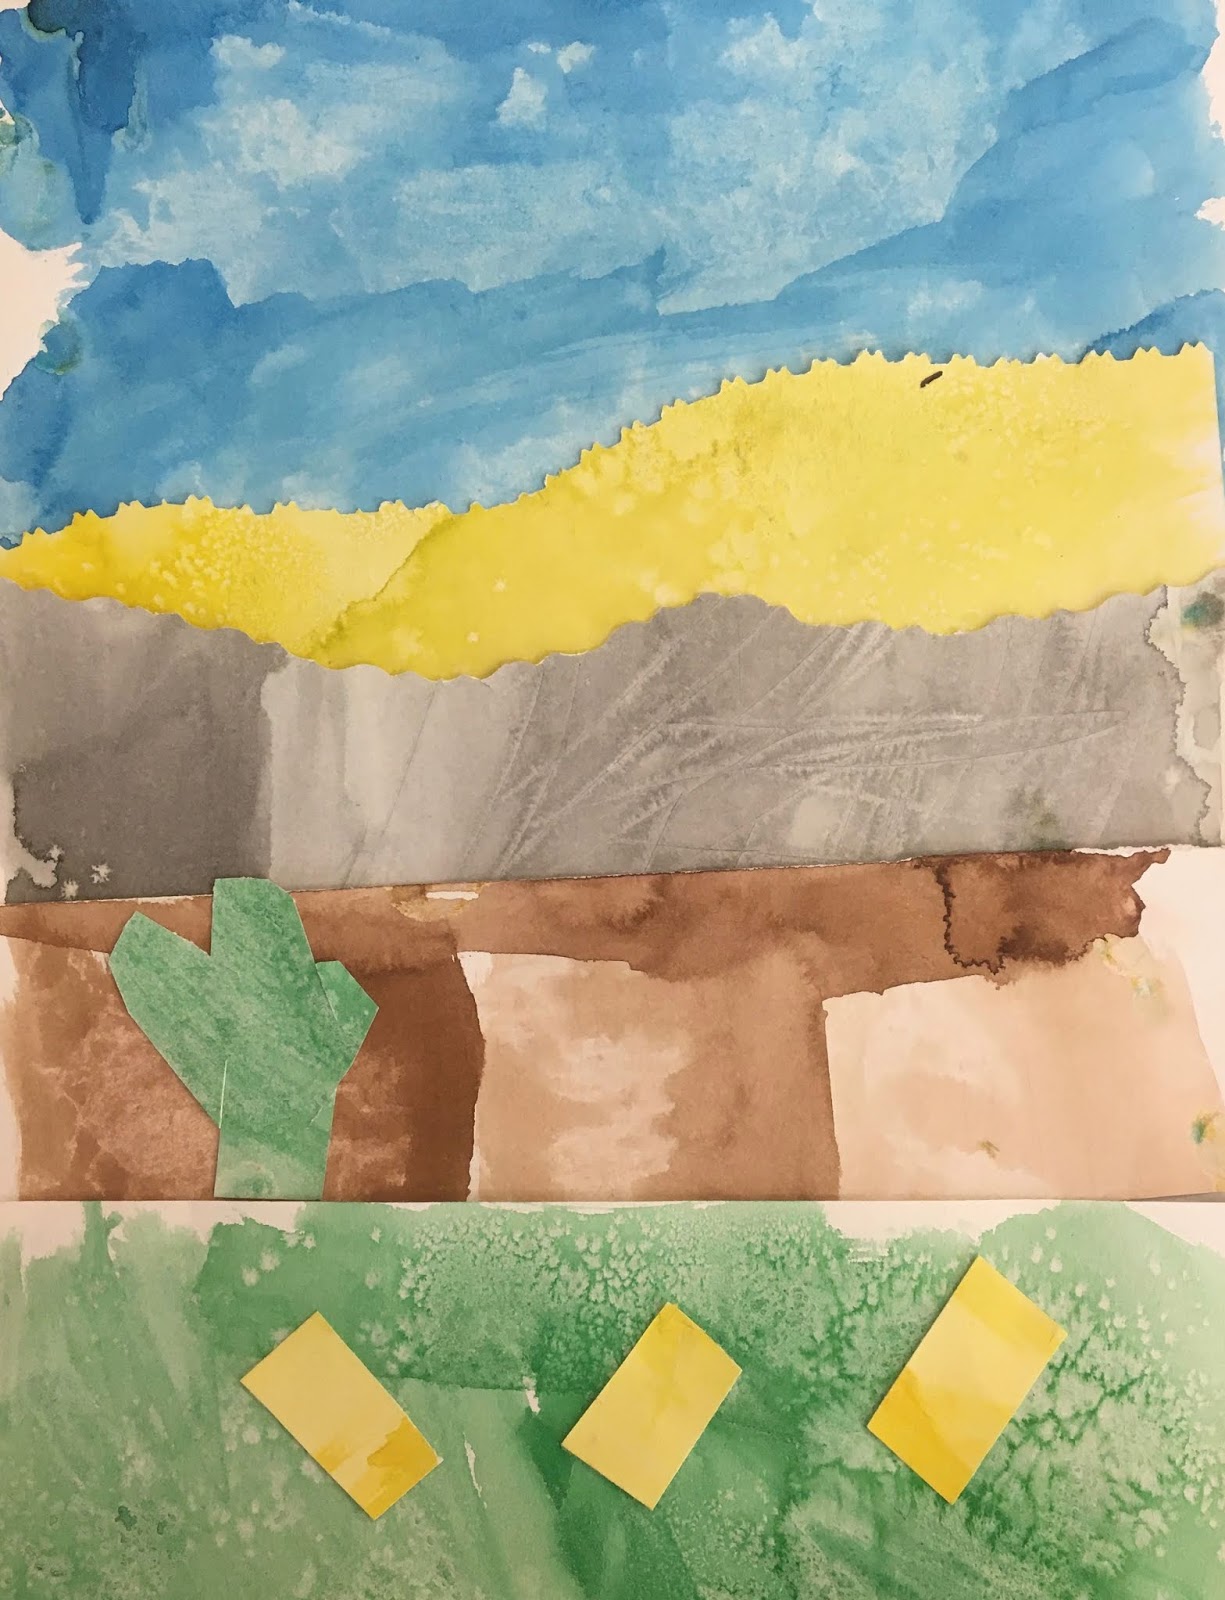
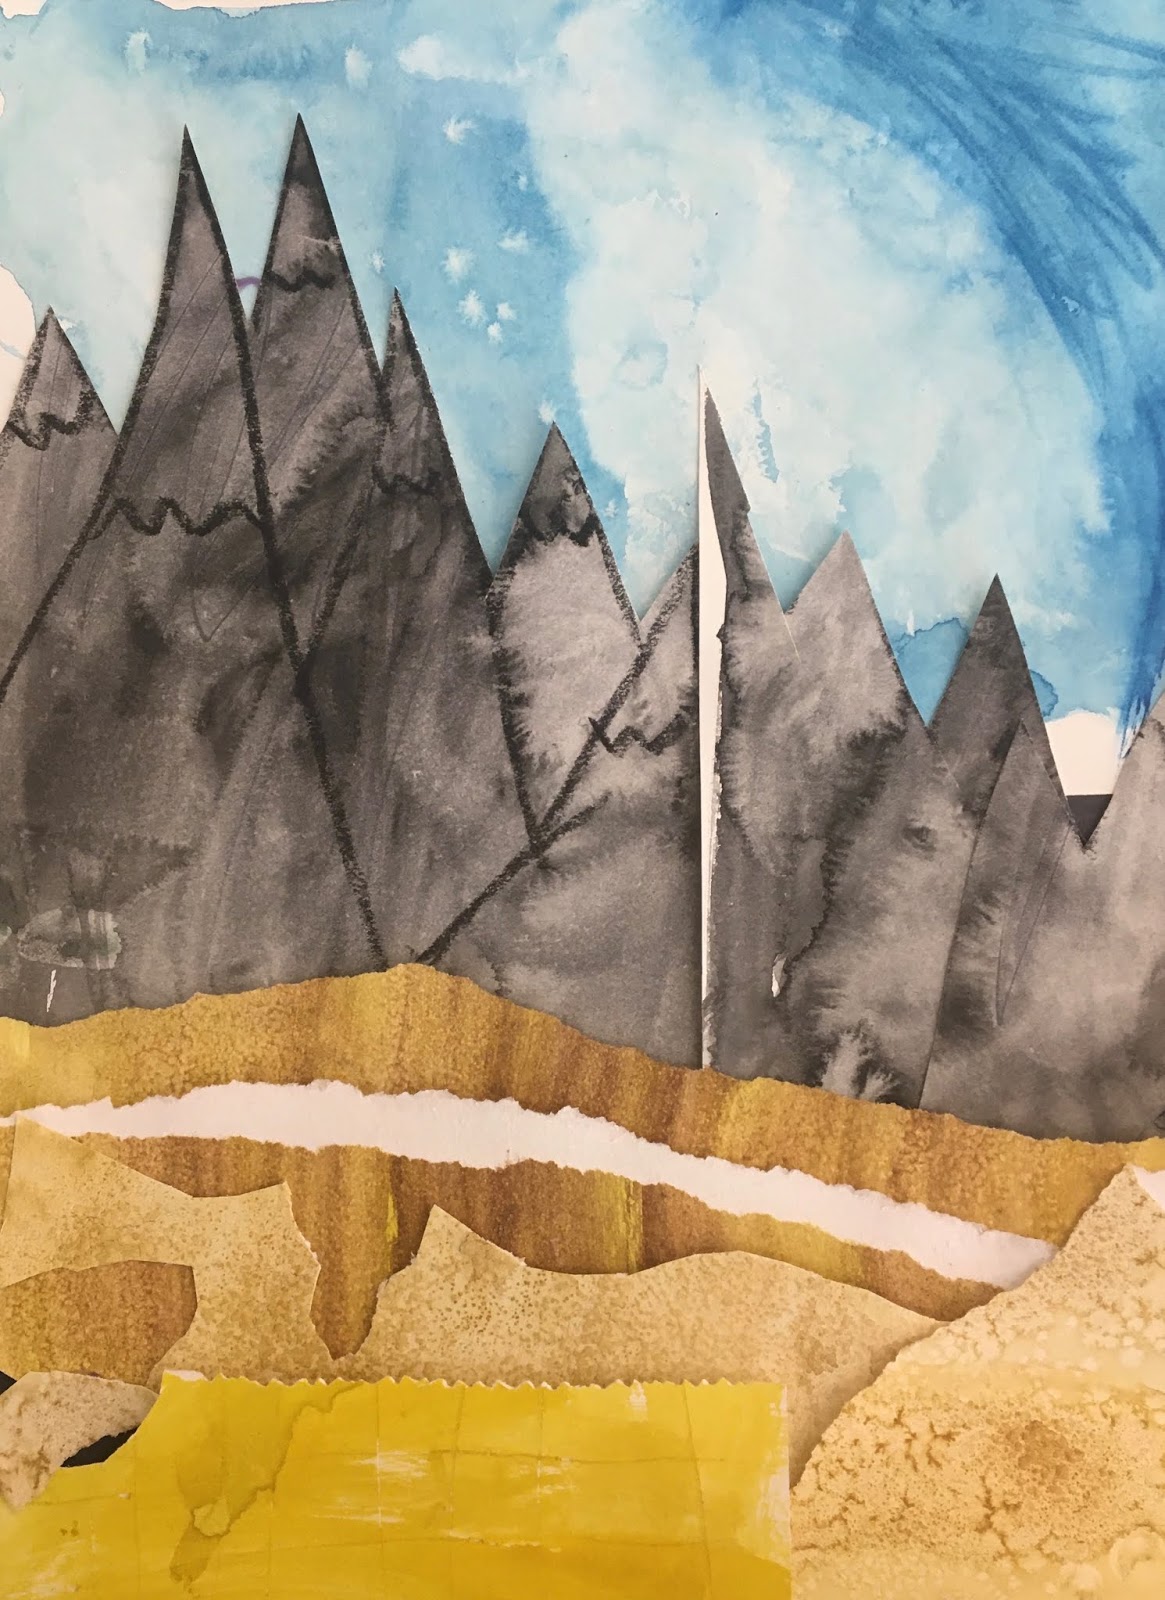
Third graders have been learning about the geographical regions of the United States in Social Studies. In art class, we focused on the geography of the Southwest. This also tied into our year-long thematic unit on texture. First, they looked at pictures of the Southwest in their textbooks and brainstormed at least five texture adjectives and nouns that they saw. Then, they learned watercolor techniques for creating each of the textures. Next, they painted a piece of paper with the color and texture technique needed for each of their nouns in their landscape. Finally, they cut and ripped the textured, painted papers to create their collages. They used their brainstorming sheets to write texture poems about the Southwest to accompany their artwork. 

The Southwest
Rocky canyon
Big rocks
Spiky cactus
Go to the Southwest
Feel all the textures
Eat all the foods
Swim at the beaches
Most importantly have fun


The Southwest
Dry canyon
Tangled grass
Flowy river
Sandy desert
Rocky caves
Feathery birds
Burning sun
Cool sunset
Spiky cactus
The Southwest is unique

The Southwest
Bumpy canyon
Spiky cactuses
Smooth gold
Prickly caves
Smooth buffalo
Rough sky
The Southwest is a fun place to go!


Southwest
Spiky grass
Rough canyon
Smooth desert
Bumpy cacti
Jagged trees
Cloudy sky.
The Southwest is awesome!


Spiky cactus
Grainy sand
Lumpy mountains
Rigid canyon
Rocky kivas
And smooth sky
It is so hot there, you will see if you go to the Southwest.

The Southwest
Rough mountain
Smooth waterfall
Spiky cactus
Rough tree
Bumpy grass
The Southwest is very hot.