Sixth graders learned how to draw in one-point perspective. In one-point perspective, all diagonal lines lead to the same point, called the vanishing point. Students designed and created their dream rooms, including furniture, skylights, and home decor. This is a super creative and quirky class, and the room themes ranged from candy to ocean to outer space!
Click here for a great tutorial on one-point perspective by art educator Harold Olejarz!
Seventh graders spend the first trimester learning about how to use value, or variations of light and darkness, to create special effects in their artwork. Click here to see some of the prep work they did and some of the images they viewed and discussed!
In fifth grade, the students receive sketchbooks that they use throughout eighth grade. Through the years, I emphasize that the sketchbook is a great place to experiment, take risks, and even make mistakes. Many students enjoy taking their sketchbooks out to recess or on vacations. Every year, students do a "Sketchbook Makeover" activity where they personalize the covers. Here are some of this year's unique examples!
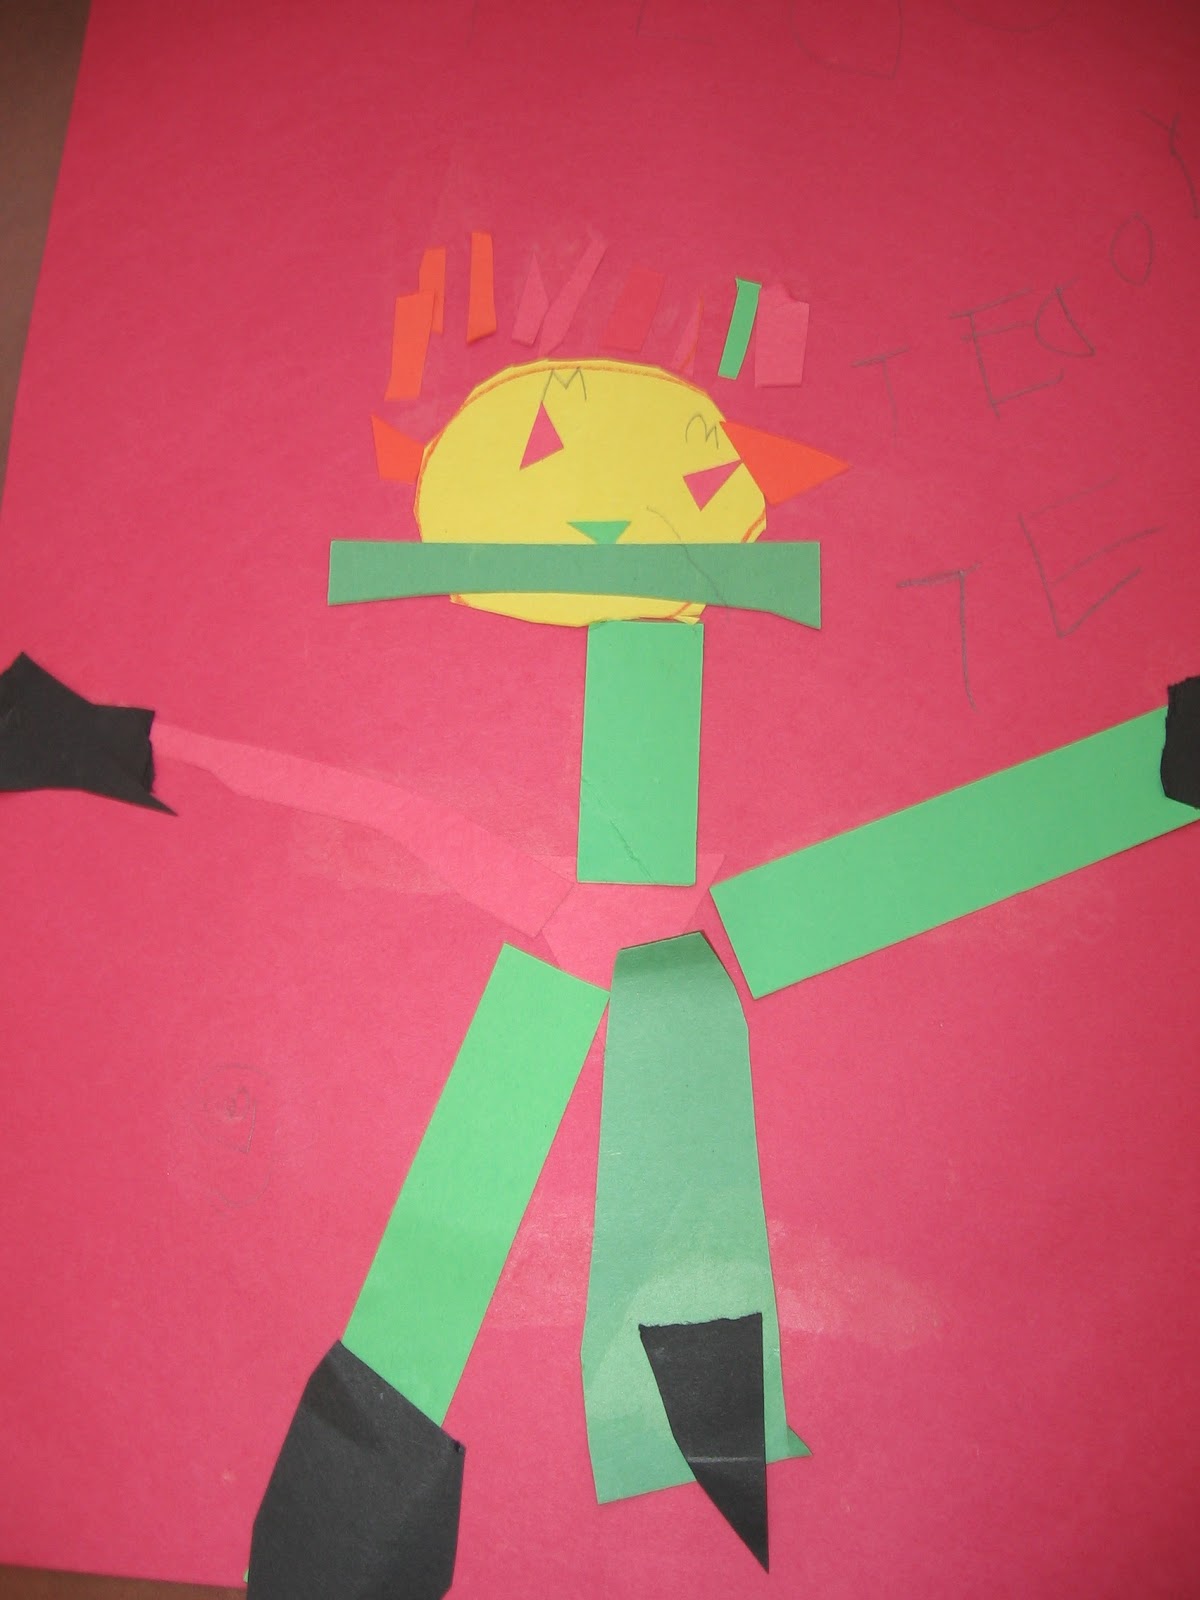
Kindergarteners created self-portrait collages during the second week of school. We looked at self portraits by Van Gogh and Andy Warhol, and then explored collages by Matisse. We discussed shapes, cutting techniques, and color choices. Here are some of the adorable results! I am really admiring the great level of detail they used.
Eighth graders learned how to use the skills of proportion, angle, and
perspective in their hand drawings. We began with blind contour
drawings, where students look only at their hand and do not look at the
page. Blind contour drawings help students focus on observation, and
their drawings are more realistic when they draw from observation rather
than imagination. The students chose from three assignments: A Surreal
"Hand"scape, Illustrated Hands, and Sign Language Hands. Here are some
examples of the eighth graders' drawings!
Kindergarteners compared two very different pictures of cows
by Franz Marc and Albert Cuyp. The students noticed that Franz Marc's painting
(1911) features bright colors and that it is not very realistic. I introduced
them to the term Expressionism and asked them what the painting expresses. They
interpreted it as a happy painting because of the colors and the leaping cow.
We also looked at Albert Cuyp's Children and a Cow (1635).
In contrast, the kindergarteners noticed that this was a more realistic
painting, and that the artist seemed more interested in showing what was there
and less interested in expressing feelings or experimenting with color. I
explained to them that a long time ago, people expected paintings to look
realistic, and this is the way that most artists painted. While there were
artists who eventually started breaking the rules and experimenting to create
art that was not realistic, for many artists, it was a tough path to choose.
Today, we learn to draw and paint in a realistic way, but we also value
imagination and experimentation much more highly.
The kindergarteners chose their favorite animals and painted
them with tempera paints in the Expressionist style. Here are some examples!
First
graders learn about color by studying the color wheel, mixing colors, and
creating various art projects. First, they learned about primary colors and
noticed that they form a triangle on the color wheel. I challenged them to
create a collage using ONLY primary colored paper (red, yellow, and blue), but
then offered them tricky "gifts" such as purple glitter and green
yarn. They politely declined. Next, they learned about the secondary colors
(purple, green, orange), which are made of two primaries. I challenged them to
make a picture with all six colors we had discussed, but when they got to their
tables they were surprised to find only yellow, blue, and red paint. They mixed
the paint colors together to create the secondary colors.
Finally,
they learned about complementary colors, which brighten each other when they are
put together. The pairings are blue and orange, purple and yellow, and red and
green. We discussed several artists' use of complementary colors, such as Van
Gogh (orange beard with a blue-toned background) and Sonia Delaunay, who
juxtaposed complementary colors in her geometric abstract work. First graders
created drawings using concentric circles in complementary colors. They loved
the feel of oil pastels, though it made for a challenging cleanup!
Here
is the Van Gogh self-portrait:
Here is a
painting by Sonia Delaunay with concentric circles and some juxtaposed
complementary colors:
Here are some
samples of first grade complementary color oil pastels:
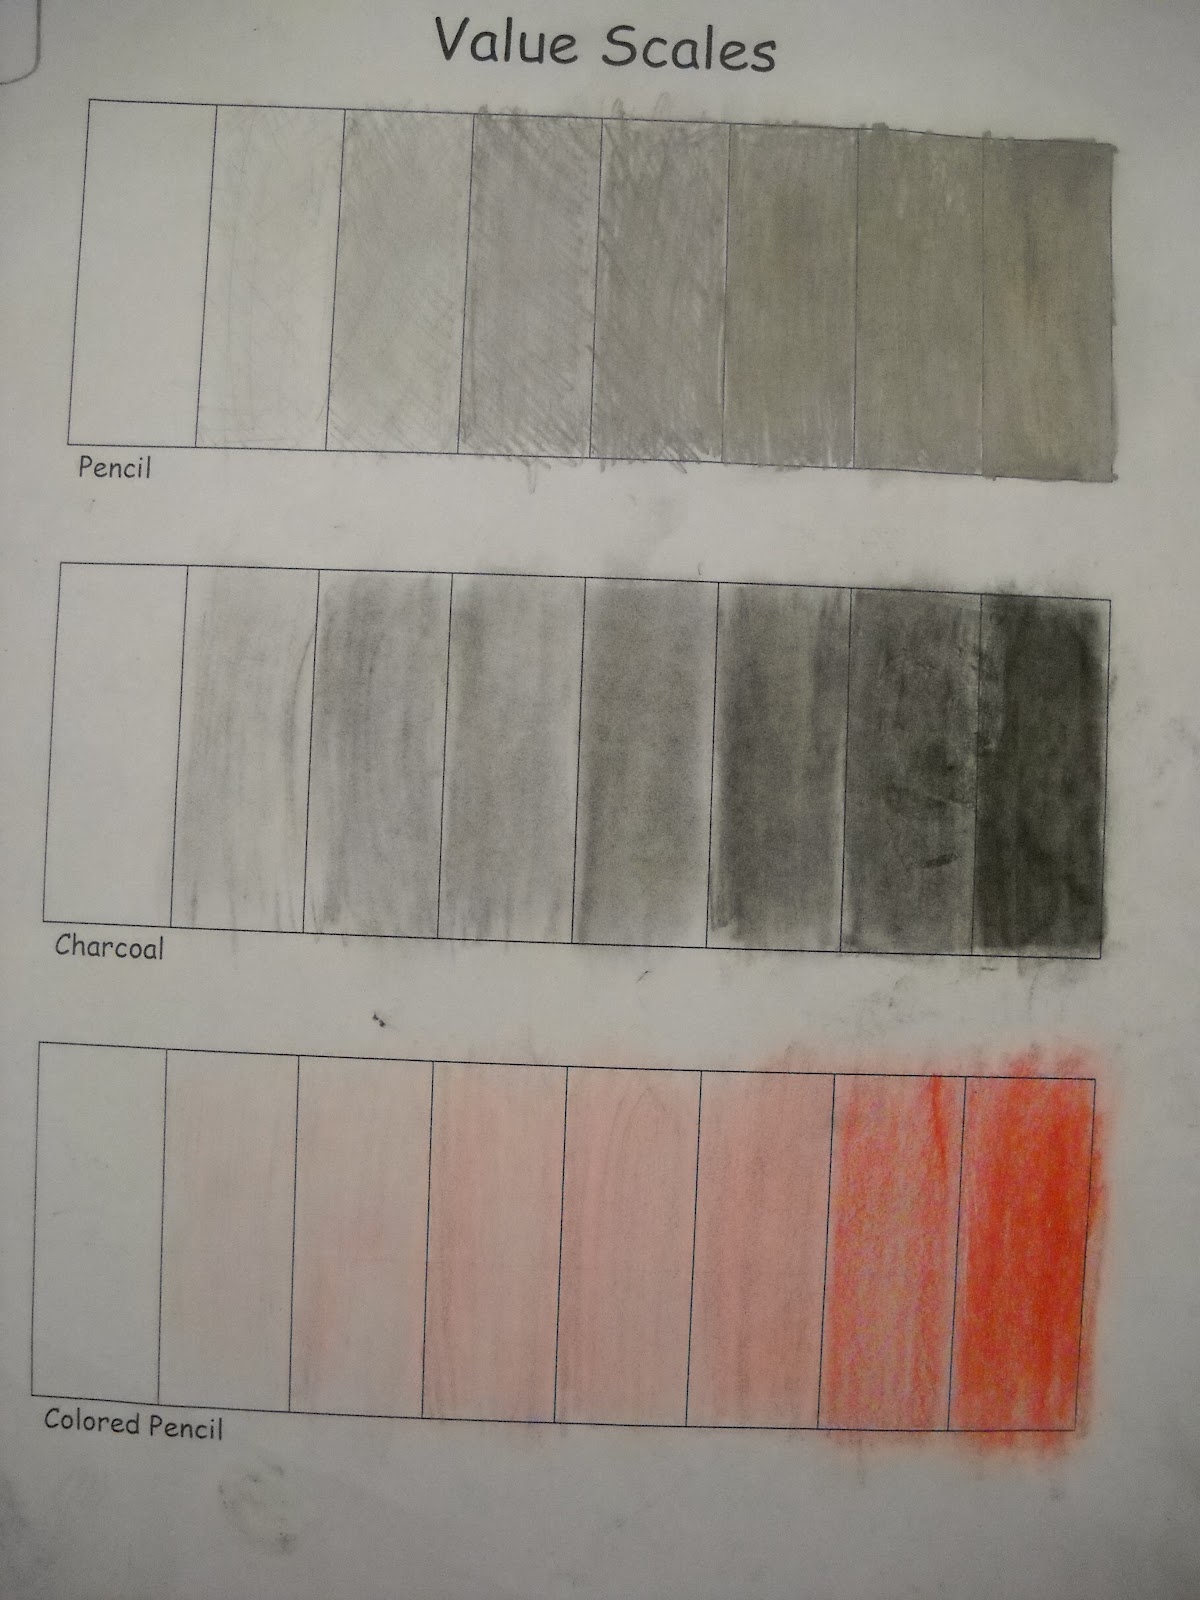
Seventh
graders spend their first trimester learning about value, or light and darkness
and how they are used in art. We looked at the work of several master
painters to discover the functions of value. For example, value can be used for
emphasis, as in this Goya painting. The light draws our
attention to the expressive face of the little boy.
Value can also
be used to create mood, as in this painting by
Picasso from his Blue Period. The predominant dark values create a glum
atmosphere.
Artists also use
value to create dimension, or the illusion of 3-dimensionality. In this Georgia
O'Keeffe painting, the dramatic values give the flower a tunnel-like effect.
Seventh graders
started with the basics of how to create value by varying the pressure of their
drawing. Each student created a Value Scale in pencil, colored pencil, and
charcoal.
Then,
each student created a contour drawing, or a drawing made only with lines. They
used dividing lines to slice up the page and "shatter" their drawing
into smaller pieces. Finally, they spent several classes on the task of shading
each shape with a graduated value scale. If you look closely at the samples,
each and every shape has a complete value scale, from darkest to lightest. I am
so proud of their work! As you can imagine, this can get a bit tedious, but
they pushed through and created some remarkable work. Each student made an
artistic decision about whether or not to use color and whether or not to
camouflage the original drawing by using one color.
This
student based her work on stained glass:
This student
initially had the hand camouflaged, but chose to outline it and added pizzaz
with the red nails:
This student
even created a hidden self-portrait:
Now
that the seventh graders have the hang of gradual shading (after shading about
100 times in their Shattered Values drawings), we will be focusing on applying
those shading techniques to realistic drawing. We will be observing 3-D shapes
and drawing them with charcoal, recording subtle shading to add dimension.
The
grand finale of our adventures in value is a great project I borrowed from my
friend Emily's curriculum. Each seventh grader will make a xerox of either
their hand or their face (eyes closed, of course). Then, they will use grid
enlargement techniques and charcoal to transfer their work, square by square,
to a larger paper. Grids are a wonderful technique used by muralists and
the inspiring portrait artist Chuck Close. Here is a lovely (but sadly,
unfinished) example from last year. More details soon!
Fifth graders spend all of their first trimester in Art creating
figurative sculptures with wire armature and carved apple heads. They
then costume their sculptures to represent the Maccabees, the heroes of
the Hanukah story. For more details about the history of Hanukah, click here.
Like the second grade portraits,
this is a project borrowed from my own elementary art experience as a
child. The unit begins with figure drawing, for which the students use
manikins. We focus on angle, proportion, and negative space. Here is an
example of one student's manikin drawing:
Following the practice drawings with the manikins, "real life" Maccabees
hopped in a time capsule and visited the classroom (in other words, we
were visited by very patient and willing faculty with costumes and props
from our generous theater department). Here is a photo of
"Sara" and "Judah" aka, our theater and music teachers...
And this is our head of school dressed as Judah!
The heads of the Maccabee sculptures are made from peeled, carved apples. Here's one after about a week:
Next, fifth graders will be sketching their Maccabees based on manikin
drawings, creating the armature with wire, covering it with plaster, and
creating costumes and accessories. Here's a finished product from last year.